Blog
Small Bathroom Tile Ideas: Sizes, Layouts, Grout & Design Choices That Work

Small bathroom tile decisions are less about finding a “magic” tile and more about controlling scale, visual rhythm, traction, maintenance, and where the eye stops. The same tile can make one compact bathroom feel calm and another feel busy depending on how it is laid, how much grout shows, where it changes material, and whether the floor, shower, and walls relate to one another.
This guide focuses on the choices that actually matter when selecting tile for a small bathroom: tile size, layout direction, grout contrast, floor safety, shower continuity, accent placement, material, pattern scale, and how to adapt those choices to narrow rooms, tub-shower combinations, and tiny powder rooms. If you are planning the room as part of a broader compact-home update, our small apartment decorating guide covers scale and visual weight beyond the bathroom, while our small-apartment organization guide is useful for keeping finished surfaces from being overwhelmed by storage clutter.
Before Choosing Tile, Decide What the Room Needs to Do
Tile should solve practical problems first. A bathroom floor needs traction. A shower floor needs even more traction and enough small joints to follow the slope to the drain. Shower walls need water resistance and manageable cleaning. A backsplash can prioritize appearance because it does not carry the same slip or drainage requirements.
| Area | Main priority | What to watch |
|---|---|---|
| Main bathroom floor | Traction + visual continuity | Very glossy finishes, excessive grout contrast |
| Shower floor | Grip + ability to follow slope | Tiles too large for the drain geometry |
| Shower walls | Water resistance + cleaning | Too many niches, borders, and pattern changes |
| Vanity backsplash | Visual interest | Competing with a patterned floor |
| Powder room | Style + easy cleaning | Overcomplicating a very small footprint |
1. Use Large-Format Tile to Reduce Visual Grid Lines
Large-format tile is popular in small bathrooms because fewer grout joints allow the floor or wall to read as one larger surface. That can make the room feel quieter and more continuous. Common practical sizes include 12×24 inches and larger formats where the substrate is flat enough to support them.
But larger is not automatically better. Very large tiles can create awkward cuts around toilets, floor drains, niches, and narrow wall returns. On a small shower floor, they may also be unable to follow the slope correctly. Large-format tile works best on broad, relatively flat planes such as the main floor or shower walls.
2. Use Smaller Tile Where the Floor Needs to Slope
A shower floor has a different job from the main bathroom floor. It needs to pitch toward the drain. Smaller tile—often mosaics—can conform to that slope more easily because each piece is small enough to change plane gradually.
The additional grout joints can also improve underfoot grip. This is one reason a bathroom can use a larger-format tile on the main floor and a smaller related mosaic in the shower without the design feeling inconsistent.
3. Match Grout Closely When You Want a Calmer Surface
Grout color changes how much visual information the tile field creates. A grout color close to the tile reduces the visible grid. High-contrast grout outlines every tile and makes pattern and shape more prominent.
Neither is inherently right or wrong. If the bathroom already has a bold vanity, patterned floor, or dramatic shower wall, lower-contrast grout can prevent the room from becoming too busy. If the tile itself is intentionally simple and the layout is the feature, contrast grout can make sense.
4. Run Rectangular Tile in the Direction You Want the Eye to Travel
Rectangular tile creates directional lines. On a narrow floor, laying the long side across the room can emphasize width. Running it lengthwise can emphasize the long axis. On shower walls, vertical layouts can strengthen a sense of height, while horizontal layouts can make a wall feel wider.
This is a subtle visual effect, not a structural rule. Use the room proportions, window locations, vanity width, and shower shape to decide which direction produces the cleanest cuts and the most intentional sightline.
5. Continue One Floor Tile Into a Curbless Shower When Practical
When the bathroom layout and waterproofing system allow it, continuing one material from the main floor into a curbless shower can make the room read as one continuous plane instead of two separate zones.
This approach requires technical planning. The shower area still needs appropriate slope and slip resistance. Sometimes the same tile is available in a smaller mosaic format specifically for the shower floor. That preserves visual continuity while solving the drainage problem.
6. Use the Same Wall Tile Beyond the Shower
Stopping tile exactly at the shower edge creates a strong boundary. Extending the same wall tile to the vanity wall, behind the toilet, or partway around the room can reduce visual segmentation and make the finish feel architectural rather than confined to one wet zone.
You do not need to tile every wall to the ceiling. Even carrying one material slightly farther than expected can help the room feel more resolved.
7. Take Shower Tile to the Ceiling
Tile that stops at an arbitrary height creates a horizontal line that can visually shorten the wall. Taking shower tile to the ceiling creates a cleaner finish and can make the vertical plane feel taller.
This is especially useful in compact tub-shower combinations, where a shower curtain, tub apron, tile edge, and paint line can otherwise create several horizontal bands in a small area.
8. Use a Vertical Stack to Emphasize Height
A straight vertical stack is one of the simplest ways to make a basic rectangular tile feel more tailored. The vertical joints draw the eye upward, which can be effective in a low-ceiling bathroom or a narrow shower.
Because the pattern is orderly, it works particularly well when you want visual interest without the movement of herringbone or diagonal layouts.
9. Use a Horizontal Stack to Visually Widen a Wall
A horizontal stack emphasizes width. It can work well behind a vanity, across the back wall of a narrow bathroom, or in a tub surround where you want the wall to read as broad and calm.
If the room already has many horizontal lines—vanity top, mirror, tub edge, shelving—consider whether adding another strong horizontal grid helps or simply repeats the same visual division.
10. Keep Herringbone to One Deliberate Area
Herringbone adds movement and can make a basic tile feel custom, but it also creates more diagonal joints and more visual activity. In a small bathroom, it usually works best as one focal surface rather than on the floor, shower walls, and backsplash at the same time.
Good locations include the back wall of a shower niche, a vanity backsplash, or one shower wall. Let the remaining surfaces stay quieter.
11. Use Mosaic as Texture, Not as a Default Everywhere
Mosaic tile is useful because it bends around slopes and curved surfaces, and the added grout joints can improve grip. But covering every surface in a tiny bathroom with small mosaic creates a dense field of joints.
A more balanced approach is often to use mosaic where its practical properties help—such as the shower floor—and a larger, related tile elsewhere.
12. Choose Porcelain for High-Wear Areas
Porcelain is dense, durable, and commonly used on bathroom floors and shower surfaces. It is available in stone, concrete, terrazzo, marble-look, and solid-color finishes, making it useful when you want the visual effect of a more delicate material without the same level of maintenance.
For a small bathroom, porcelain can also simplify the material palette because one collection may offer coordinated large-format field tile and smaller mosaics.
13. Use Ceramic Where Weight and Budget Matter More
Ceramic tile can be a practical choice for walls and backsplashes. It is often lighter and can be easier to cut than dense porcelain. That can matter in DIY-friendly projects or when the tile is primarily decorative rather than carrying heavy floor traffic.
Always check the manufacturer’s intended use. A tile rated only for walls should not be treated as a bathroom-floor tile simply because the design looks suitable.
14. Use Natural Stone Selectively
Marble, limestone, travertine, and other natural stones can add depth and variation that printed tile cannot fully reproduce. But they may require sealing, more careful cleaning, and greater tolerance for natural variation.
In a small bathroom, stone can be effective as one significant surface—such as a vanity backsplash or shower wall—while the floor uses a more predictable porcelain with suitable traction.
15. Use One Statement Tile and Let the Rest Support It
A compact bathroom can absolutely handle bold tile. The problem comes when several surfaces all compete. If the floor is highly patterned, keep the shower wall simpler. If the shower wall is dramatic, choose a quieter floor and grout.
One strong focal surface often feels more intentional than several medium-strength patterns distributed around the room.
16. Use Pattern Scale That Matches the Surface
A pattern that looks balanced on a showroom wall may feel oversized or chaotic on a narrow bathroom floor. Before ordering, estimate how many full pattern repeats will actually fit across the surface.
If the entire floor shows only one and a half repeats, the design may feel accidental. Smaller-scale patterns often work better on very compact floors because enough repeats are visible for the pattern to read clearly.
17. Plan the Tile Layout Before the Installer Starts
Good tile selection can be undermined by poor layout. Before setting tile, decide where full tiles should appear and where cuts will land. The most visible wall, the centerline of a vanity, the shower valve, the niche, and the doorway all affect what looks balanced.
- Avoid tiny sliver cuts where possible.
- Center important walls intentionally rather than simply starting at one corner.
- Check how grout joints align with niches and fixtures.
- Dry-lay floor tile to see how the pattern lands at the doorway.
- Consider the thickness of grout joints before calculating the final layout.
18. Treat the Niche as Part of the Tile Layout
A shower niche should not look like it was cut into the tile after the fact. Ideally, its edges and shelves relate to surrounding grout joints or tile modules.
Using the same tile inside the niche creates continuity. Using a contrasting mosaic makes the niche a feature. Both can work; what matters is deciding intentionally rather than adding a different tile simply because leftover material is available.
19. Use Tile Baseboards for a Cleaner Wet-Area Finish
In bathrooms where painted wood baseboards are vulnerable to splashes, a tile base can create a durable and visually clean transition. Using the same floor tile as a low baseboard also helps the floor finish wrap the room rather than stop abruptly at the wall.
Keep the height consistent and coordinate it with door trim so the base does not create another awkward line.
20. Choose Floor Texture Based on Wet-Use Conditions
A bathroom floor can look beautiful and still be unpleasant or unsafe when wet. Highly polished surfaces may be more slippery, and deep-textured surfaces can be harder to clean. The ideal finish balances traction and maintenance.
Check the tile manufacturer’s floor-use and slip-resistance information rather than assuming every matte tile is equally suitable. Shower floors deserve particular attention because they are regularly wet and often used barefoot.
21. Use Fewer Tile Types Than You Think You Need
One of the easiest ways to make a small bathroom feel disjointed is to use a different tile for every function: one floor tile, another shower floor tile, another shower wall tile, a fourth niche tile, and a fifth vanity backsplash.
You can often create a richer result with two coordinated tile types and variation in size or layout. For example: one porcelain collection on the main floor and shower walls, plus its matching mosaic on the shower floor. Or one simple field tile everywhere, with a single patterned floor as the focal point.
Best Tile Strategies by Small-Bathroom Shape
| Bathroom type | Tile approach | Why it works |
|---|---|---|
| Long, narrow bathroom | Rectangular floor tile across the width; calmer grout | Emphasizes width and reduces tunnel effect |
| Compact square bathroom | Simple continuous floor with one focal wall | Keeps the room from feeling divided into zones |
| Tub-shower combination | Take surround tile to the ceiling | Reduces horizontal cut-off lines |
| Curbless shower | Related floor tile across bathroom and shower | Maintains continuity while allowing proper slope |
| Small powder room | One statement surface, fewer total materials | Adds personality without overloading the footprint |
How to Choose Between Light and Dark Tile
Light tile reflects more light and can make boundaries feel softer, but dark tile is not automatically wrong in a small bathroom. A dark floor with related wall tones can feel grounded and sophisticated. Dark tile becomes visually heavier when it is combined with many sharp contrasts and frequent material changes.
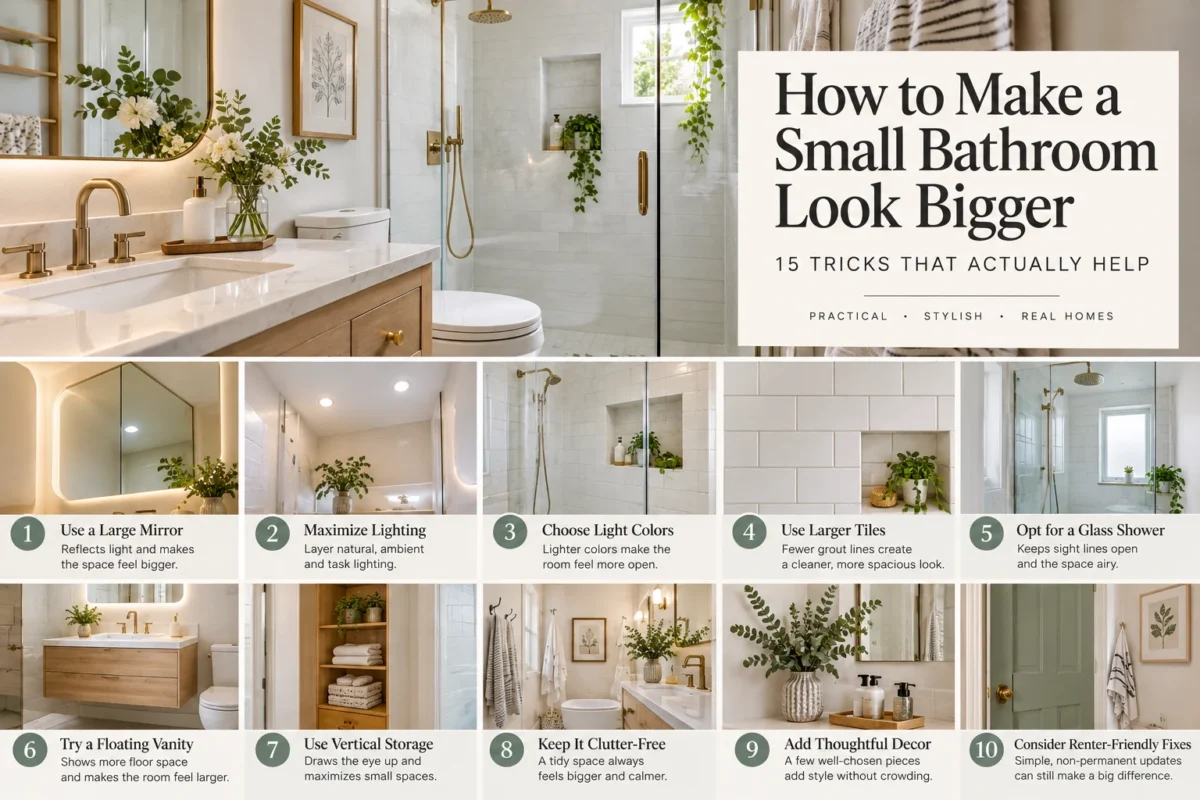
If your goal is specifically to make the room feel more open, combine your tile decisions with the broader principles in our guide to making a small bathroom look bigger: clear sightlines, even lighting, visible floor, controlled storage, and fewer visual breaks.
A Practical Tile-Planning Sequence
- Measure every surface. Record floor dimensions, shower walls, niches, tub surrounds, and backsplash areas separately.
- Choose the functional floor tile first. Confirm floor rating and wet-area suitability.
- Decide whether the shower floor needs a smaller format.
- Choose the dominant wall tile. Keep it related to the floor unless contrast is intentional.
- Select grout color before finalizing the pattern. Grout changes the visual effect substantially.
- Sketch the layout. Mark full tiles, cuts, centerlines, niches, plumbing, and transitions.
- Order samples. Look at them vertically and horizontally in the actual bathroom light.
- Check maintenance. Consider grout cleaning, sealing, texture, and water spotting.
- Order extra material. Cuts, breakage, pattern matching, and future repairs require spare tile.
Tile Choices That Often Backfire in Tiny Bathrooms
| Choice | Why it can be a problem | Better approach |
|---|---|---|
| Five unrelated tile styles | Creates too many visual boundaries | Limit the palette and vary size/layout instead |
| High-contrast grout everywhere | Turns every surface into a strong grid | Use contrast only where the pattern is intentional |
| Very large tile on a sloped shower floor | May not follow drain slope cleanly | Use a compatible smaller format |
| Glossy floor tile | Can become slippery when wet | Check wet-area floor suitability and traction |
| Random accent strips | Creates arbitrary horizontal lines | Use one full focal surface or skip the accent |
| Pattern without layout planning | Leads to awkward cuts and partial repeats | Dry-lay or draw the layout first |
Frequently Asked Questions
What size tile is best for a small bathroom?
There is no single best size. Larger-format tile can reduce grout lines on broad floors and walls, while smaller tile is often more practical on shower floors because it follows slope and adds joints for grip. The best choice depends on the surface and layout.
Do large tiles make a small bathroom look bigger?
They can make surfaces feel calmer because there are fewer grout joints, but proportion and layout matter more than size alone. A large tile with awkward narrow cuts can look less resolved than a smaller tile laid carefully.
Should floor and shower tile match?
They do not have to be identical, but related color, material, or pattern usually helps a small room feel cohesive. Many tile collections offer a large field tile and a smaller matching mosaic, which is useful for maintaining continuity while solving shower-floor slope requirements.
Is dark tile bad for a small bathroom?
No. Dark tile can work well when lighting is good and the palette is controlled. The bigger risk is excessive contrast and too many unrelated materials, which visually divide the room.
What grout color is best for a small bathroom?
If you want the tile surface to feel calmer and more continuous, choose grout close to the tile color. If the tile pattern itself is meant to be a feature, contrasting grout can emphasize the layout. Also consider staining and maintenance before choosing very light grout in high-use floor areas.
Bottom Line
The best small bathroom tile ideas are not just decorative. They solve a practical problem while controlling how many visual breaks the room contains. Use large-format tile where fewer joints help, smaller tile where slope and grip require it, deliberate grout contrast, and a limited material palette.
Plan the layout before installation, treat niches and transitions as part of the design, and give one surface permission to be the focal point instead of asking every tile to compete. That approach produces a small bathroom that feels considered rather than crowded.