
A tissue box cover sewing pattern works best when it is drafted from the tissue box you actually use rather than copied from a single set of “standard” dimensions. Tissue boxes vary enough in length, width, height, and opening position that a pattern can look perfect on paper and still bind at the corners, sag at the top, or expose cardboard at the base.
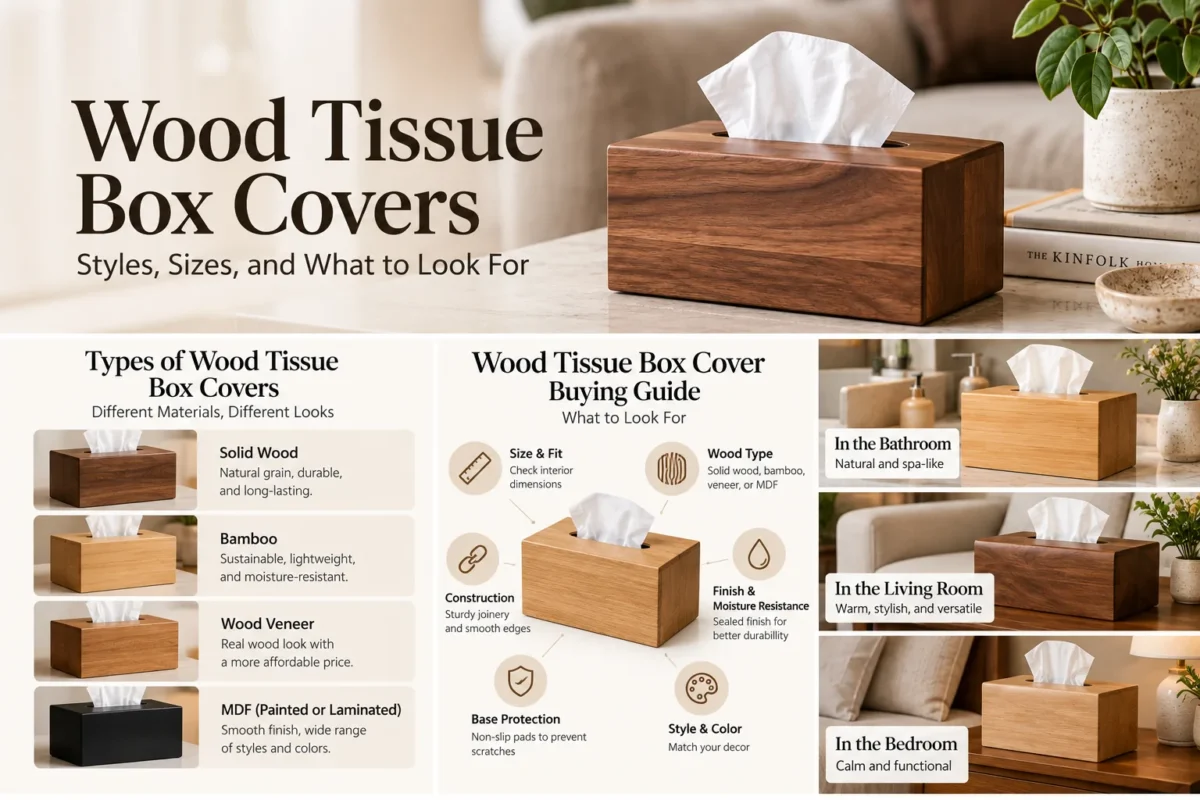
If you are still deciding whether fabric is the right material, start with our fabric tissue box covers vs. hard holders comparison. For shape and footprint differences, the square vs. rectangular tissue box cover guide is also useful before you draft your pattern.
The Construction Method Used in This Tutorial
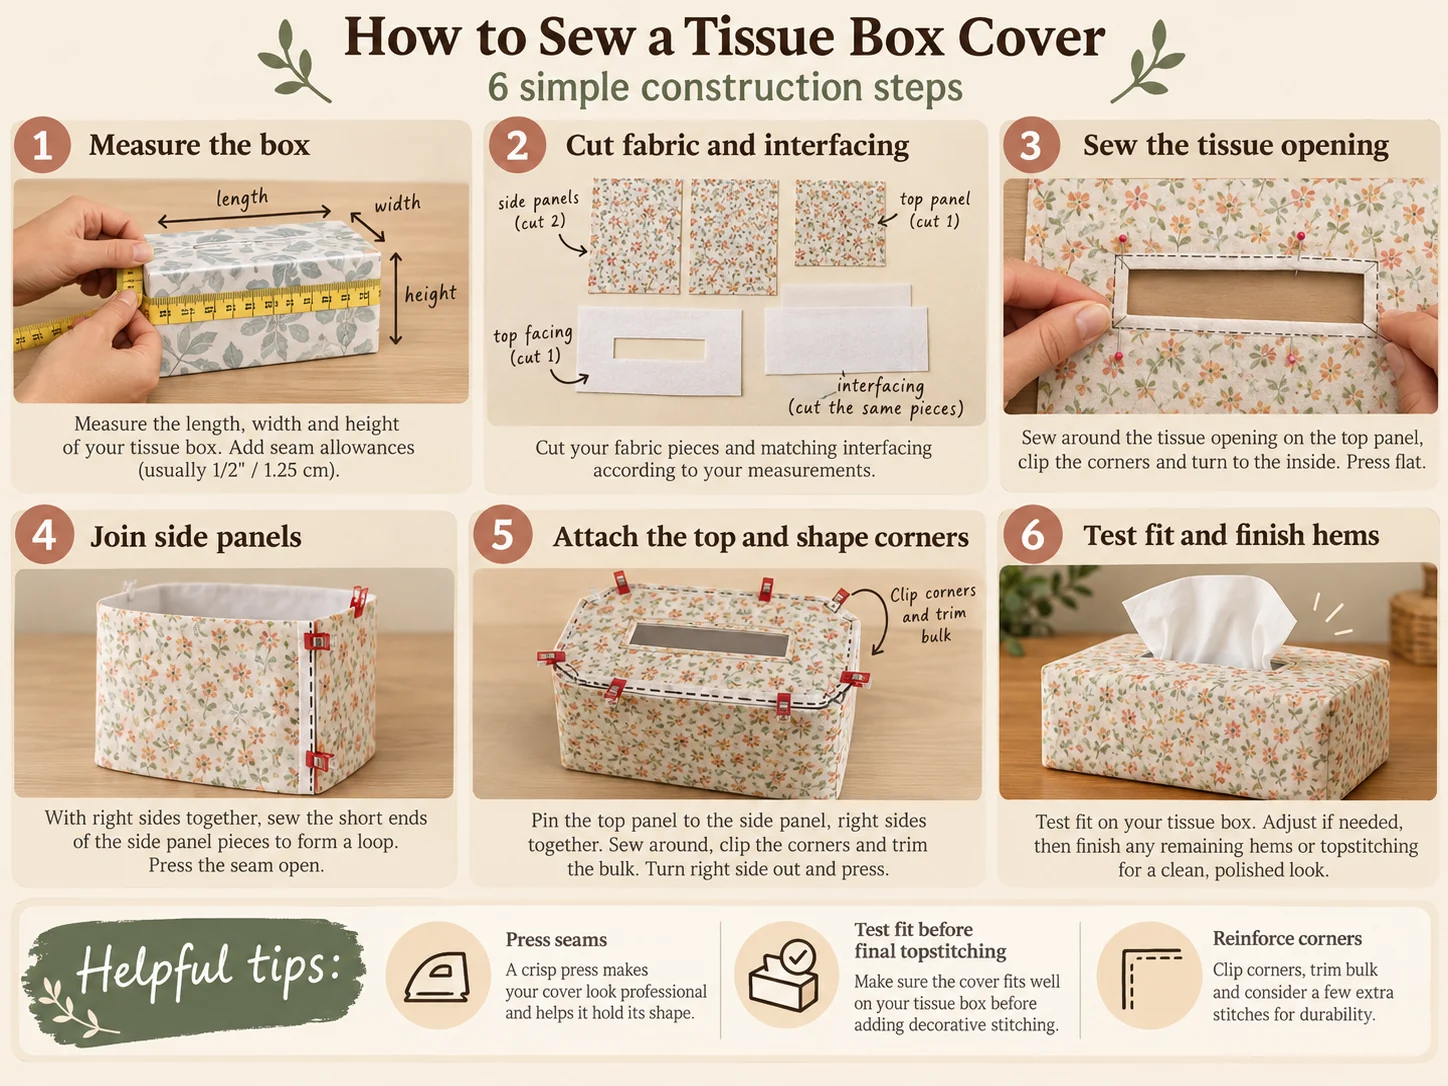
There are several ways to sew a tissue box cover. You can cut one large cross shape and stitch the corners, make a loose drawstring sleeve, or construct a box from separate panels. For a fitted home-decor cover, the separate-panel method is the most forgiving because each dimension is controlled independently.
- Top panel: controls length, width, and the tissue opening.
- Two long side panels: control the long walls and finished height.
- Two short side panels: control the short walls and finished height.
- Bottom edge: stays open so the cardboard tissue box can slide in from underneath.
- Opening facing: gives the tissue slot a clean edge without relying on a raw slit or bulky bias binding.
This construction works for both cube and rectangular tissue boxes. The pattern pieces change size, but the sewing order stays the same.
Tools and Materials
- 1/2 yard outer fabric for most standard tissue boxes; buy 5/8 to 3/4 yard for large boxes, directional prints, or pattern matching
- Light- to medium-weight fusible interfacing, optional but recommended for quilting cotton and linen blends
- A small scrap of matching fabric for the opening facing
- Coordinating all-purpose polyester thread
- Sewing machine with a standard straight-stitch foot
- Iron and ironing board
- Clear ruler, measuring tape, fabric marking pen or chalk
- Paper for drafting the pattern
- Fabric scissors or rotary cutter and mat
- Pins or sewing clips
- Point turner or blunt chopstick for shaping corners
- Optional: serger or zigzag stitch for seam finishing
Best Fabrics for a Tissue Box Cover
The ideal fabric has enough body to hold a rectangular shape but is not so thick that the top corners become bulky. For a first project, medium quilting cotton or a light home-decor cotton is easier to control than slippery, stretchy, or heavily textured material.
| Fabric | How it behaves | Interfacing? | Best use |
|---|---|---|---|
| Quilting cotton | Easy to cut and sew; can look soft without support | Usually yes | Beginner projects, printed covers |
| Linen-cotton blend | Natural texture with moderate body | Optional to recommended | Relaxed, neutral interiors |
| Light canvas | Crisp and durable | Usually no | Structured covers |
| Home-decor cotton | Substantial and stable | Often no | Polished decorative covers |
| Velvet | Luxurious but directional and bulky | Usually no | Intermediate sewists |
| Stretch knit | Can distort and sag | Not ideal | Avoid for this fitted method |
| Very heavy upholstery fabric | Bulky at corners and opening | No | Usually too heavy for a small cover |
If your fabric has a large motif, stripe, plaid, nap, or obvious one-way print, buy extra. All four side panels should read upright when the cover is on the box, and pattern matching can consume much more fabric than the bare pattern area suggests.
Step 1: Measure the Actual Tissue Box
Measure the cardboard box at its widest points. Do not rely on dimensions printed on a multipack or an online listing unless you have confirmed they match the box in front of you.
- Length (L): measure the longest horizontal side.
- Width (W): measure the shorter horizontal side.
- Height (H): measure from the table to the highest cardboard edge, not to the tissue.
- Opening: measure the length and width of the factory tissue opening and note whether it is centered.
Measure at two or three points if the cardboard is slightly bowed. Use the largest measurement. A fabric cover can tolerate a little ease, but it cannot stretch around a rigid box if the pattern was drafted too small.
Step 2: Add Wearing Ease Before You Add Seam Allowance
This is the part many quick tutorials skip. Ease and seam allowance are not the same thing. Ease creates room around the cardboard box; seam allowance is the fabric consumed by sewing.
Finished length = box length + 1/4 in
Finished width = box width + 1/4 in
Finished height = box height + 1/8 to 1/4 in
If you use bulky fabric, thick interfacing, or a lining, increase length and width ease to about 3/8 in total.
That ease is total ease across the dimension, not 1/4 inch on every side. A cover that is too loose loses the tailored look; a cover that is too tight catches on the cardboard corners and can pull the top panel out of shape.
Step 3: Draft the Five Pattern Pieces
The formulas below use a 1/2-inch seam allowance and a 1-inch bottom hem allowance. A one-inch hem allowance gives you enough fabric for a clean double-fold 1/2-inch hem.
Let: FL = finished length with ease, FW = finished width with ease, FH = finished height with ease, SA = 1/2 in seam allowance, BH = 1 in bottom hem allowance.
Top — cut 1: (FL + 2SA) × (FW + 2SA)
Long sides — cut 2: (FL + 2SA) × (FH + SA + BH)
Short sides — cut 2: (FW + 2SA) × (FH + SA + BH)
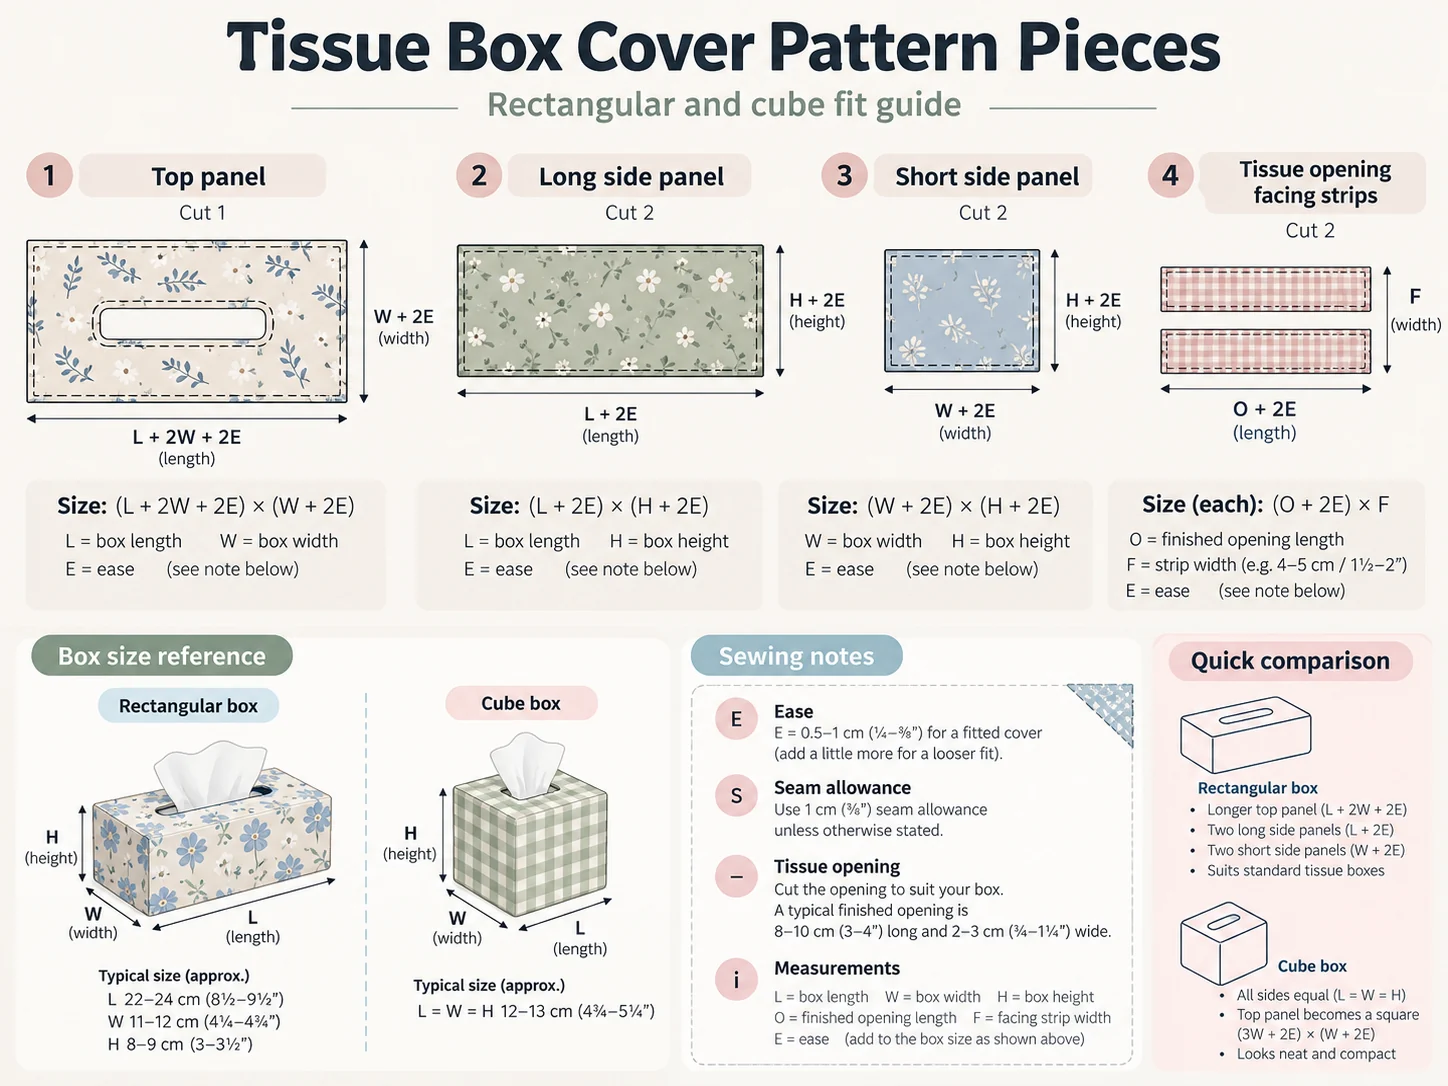
Label the top edge and bottom edge on every side-panel pattern piece. This is especially important with directional prints; otherwise one wall of the finished cover can accidentally end up upside down.
Worked example: cube tissue box
Suppose your box measures 5 inches long × 5 inches wide × 5 1/4 inches high. Add 1/4 inch total ease to length and width and 1/4 inch to height:
- FL = 5 1/4 in
- FW = 5 1/4 in
- FH = 5 1/2 in
With a 1/2-inch seam allowance and 1-inch bottom hem allowance, cut:
- Top: 6 1/4 × 6 1/4 in
- Long sides, cut 2: 6 1/4 × 7 in
- Short sides, cut 2: 6 1/4 × 7 in
Worked example: rectangular tissue box
Suppose the box measures 9 × 4 3/4 × 3 1/2 inches. Add 1/4 inch total ease to length and width and 1/4 inch to height:
- FL = 9 1/4 in
- FW = 5 in
- FH = 3 3/4 in
Cut:
- Top: 10 1/4 × 6 in
- Long sides, cut 2: 10 1/4 × 5 1/4 in
- Short sides, cut 2: 6 × 5 1/4 in
These examples are drafting demonstrations, not universal standard sizes. Always substitute your own measurements into the formulas.
Step 4: Draft the Tissue Opening
Center the top pattern over the tissue box and transfer the position of the factory opening. For most boxes, the fabric opening should be slightly smaller than the cardboard opening so the printed cardboard does not peek through.
- Trace the factory opening onto the paper top pattern.
- Move the opening line inward by about 1/4 inch on all sides.
- Round the corners slightly instead of drawing sharp 90-degree corners; rounded corners are easier to clip and turn smoothly.
- Check that the opening remains large enough for tissues to pull without dragging.
If the cardboard opening is unusually small, do not shrink it automatically. Pull several tissues from the box and observe the path. The goal is to hide cardboard without creating so much friction that tissues tear or lift the fabric cover.
Step 5: Cut and Interface the Fabric
Prewash fabric if you expect the finished cover to be washable. Dry it the way you plan to dry the cover, then press it flat before cutting. If you skip prewashing and later wash the cover, even a small amount of shrinkage can make a fitted cover noticeably tighter.
- Cut one top panel.
- Cut two long side panels.
- Cut two short side panels.
- Cut one facing piece at least 1 1/4 inches wider than the finished tissue opening on every side.
- If using interfacing, cut interfacing for all five outer panels or at minimum for the top panel and a 1 1/2-inch-wide ring around the opening.
Fuse interfacing before sewing the opening. Follow the interfacing manufacturer’s temperature and steam instructions. Let fused pieces cool completely on the ironing board before moving them; warm adhesive can shift.
Step 6: Sew a Clean Faced Tissue Opening
A faced opening looks cleaner than simply cutting a slit and folding the raw edges under. It also distributes stress around the opening, where the fabric gets tugged every time a tissue is pulled.
- On the wrong side of the facing, mark the exact finished opening.
- Place the facing right sides together with the top panel, centering the marked opening over the opening position on the top.
- Pin thoroughly so the facing cannot creep.
- Stitch directly on the marked opening line using a short 2.0-2.5 mm stitch length.
- Cut out the center, leaving about a 1/4-inch seam allowance inside the stitched line.
- Clip curved corners almost to the stitching without cutting through it. On straighter rounded rectangles, make several small clips so the seam allowance can spread.
- Push the facing through the hole to the wrong side of the top panel.
- Roll the seam with your fingers so the facing does not show from the right side, then press carefully.
- Understitch the facing where practical, then topstitch 1/8 inch from the opening edge for a crisp finish.
- Trim the outer edge of the facing into a neat rounded rectangle and secure it to the top panel with a narrow zigzag, edge stitch, or a few hand tacks.
Test the opening on the tissue box before you assemble the cover. Pull three or four tissues. If they catch badly now, it is easier to enlarge the opening before the side panels are attached.
Step 7: Sew the Four Side Panels Into a Loop
Arrange the panels in this order: long side, short side, long side, short side. Keep all top edges aligned and all directional prints facing the same way.
- Place the first long and short side right sides together.
- Sew the vertical seam with a 1/2-inch seam allowance, stopping exactly at the top-edge seam line rather than sewing beyond it.
- Repeat until all four side panels form a loop.
- Join the final vertical seam.
- Press seams open for the flattest corners, or press to one side if your fabric ravels heavily.
- Finish raw seam edges with a serger, zigzag stitch, or pinking shears if desired.
Before attaching the top, slip the side loop over the tissue box. The loop should slide on without force but should not hang loose. If it is dramatically too large or small, correct the vertical seams now rather than trying to fix the fit at the top.
Step 8: Attach the Top Panel Without Distorting the Corners
The top seam determines whether the cover looks tailored or twisted. Mark the midpoint of all four top-panel edges and the midpoint of all four side-loop edges before pinning.
- With right sides together, match the top panel to the side loop at all four midpoints and corners.
- Pin one edge at a time. Do not stretch either piece to make it fit.
- Sew the first edge with a 1/2-inch seam allowance, stopping exactly 1/2 inch from the corner.
- Lower the needle, lift the presser foot, pivot the work, smooth the next side into position, and continue.
- Repeat around all four sides.
- At each corner, clip the side-loop seam allowance diagonally toward—but not through—the stitching so the seam can spread when turned.
- Trim bulky seam allowances if necessary and finish the raw edge.
- Turn the cover right side out and push corners out gently with a point turner.
If one top edge develops a pucker, unpick only that section, redistribute the fabric between the midpoint and corner marks, and sew it again. Pressing a pucker flat rarely makes it disappear permanently.
Step 9: Fit the Cover Before Hemming
Slide the unfinished cover over the box and pull a tissue through the opening. Check four things before you hem:
- The top lies flat without tenting upward.
- The side seams fall near the cardboard corners rather than spiraling around the box.
- The bottom edge reaches slightly below the cardboard base so the box will be fully concealed after hemming.
- The cover can be removed without tugging hard on the opening.
If the cover is slightly too loose, take in the four vertical seams evenly—1/16 or 1/8 inch at each seam can change the total circumference more than you might expect. If it is slightly too tight, reduce the seam allowances only if you left enough fabric beyond the stitching line.
Step 10: Hem the Bottom Edge
- Turn the bottom raw edge to the wrong side by 1/2 inch and press.
- Turn it up another 1/2 inch and press again.
- Try the cover on the box one final time before stitching.
- Topstitch close to the inner folded edge.
- Press the finished cover from the wrong side where possible to avoid flattening textured fabric.
If your box is unusually short and a one-inch hem would consume too much height, draft a smaller bottom hem allowance from the beginning—for example, 3/4 inch for two 3/8-inch folds.
Optional: Add a Full Lining
A lining is useful when the outer fabric is light-colored, loosely woven, or likely to look unfinished from the bottom. It also gives the cover more body without relying on very stiff interfacing.
For the cleanest lined version, cut a second five-piece shell from lining fabric using the same pattern but omit the one-inch hem allowance at the bottom. Assemble the lining shell separately. After the outer cover is assembled, place the lining inside with wrong sides together, baste the two layers around the bottom edge, and finish the bottom with double-fold bias binding. At the tissue opening, either face the outer and lining together from the beginning or hand-slipstitch the lining neatly around the already-finished facing.
If this is your first fitted cover, make the unlined version first. The fit issues that matter most—ease, opening size, and top-corner alignment—are easier to diagnose without a second shell.
How to Make the Cover More Structured
- Light structure: use woven fusible interfacing on the top only.
- Medium structure: interface all five panels with lightweight fusible interfacing.
- Crisp structure: use medium-weight interfacing on quilting cotton, but reduce seam bulk at corners by trimming interfacing out of the seam allowances.
- Soft structure: skip interfacing and use linen-cotton or home-decor fabric with natural body.
Very stiff craft interfacing is usually unnecessary. A tissue box cover should hold its shape, but it still needs to turn right side out and sit naturally over a cardboard box.
Cube vs. Rectangular Pattern Adjustments
| Detail | Cube box | Rectangular box |
|---|---|---|
| Top panel | Nearly square | Long and narrow |
| Fabric grain | Less visually obvious | Keep long dimension parallel to a stable grainline when possible |
| Opening | Often compact and centered | Usually longer and more directional |
| Pattern matching | All four walls similarly visible | Long sides dominate visually |
| Fit errors | Can look boxy if too loose | Long top can ripple if seam lengths do not match |
The same pattern formulas work for both shapes. Do not create separate “cube” and “rectangular” formulas unless the construction method itself changes.
How to Handle Tapered or Bulging Tissue Boxes
Some cardboard boxes bow outward when full or taper slightly from top to bottom. Measure the widest point in each direction and draft from those maximum dimensions. A straight-sided fabric cover will have a small amount of ease near narrower areas, which is usually preferable to a cover that catches halfway down.
For a strongly tapered decorative box, make a quick muslin first. Pin excess fabric at each vertical seam while the muslin is on the box, transfer those adjustments to the paper pattern, and only then cut your final fabric.
Troubleshooting Fit Problems
| Problem | Likely cause | Fix |
|---|---|---|
| Cover will not slide over the box | No ease, inaccurate measurements, bulky interfacing | Increase finished length/width or reduce seam allowance if possible |
| Cover looks baggy | Too much ease | Take in vertical seams evenly |
| Top bows upward | Cover too tight or top opening/facing too stiff | Add ease or reduce bulk around opening |
| Top has ripples | Top and side-loop seam lengths do not match | Re-measure pattern; use midpoint marks while pinning |
| Side seams twist | Panels were stretched or cut off-grain | Recut accurately; do not stretch while attaching top |
| Tissues snag | Opening too small or poorly clipped | Enlarge and refinish the opening |
| Cardboard shows at bottom | Finished cover too short | Use a narrower hem or increase height pattern next time |
| Cover collapses when box is nearly empty | Fabric lacks body | Add interfacing or use firmer fabric |
Common Sewing Mistakes to Avoid
Adding seam allowance before deciding on ease
Draft the finished cover size first. Then add seam allowance. Mixing the two steps makes it difficult to know whether a fit problem comes from the design or the sewing.
Assuming every cube box is the same size
Even small differences matter in a fitted cover. Measure each brand or box style you plan to use.
Cutting the tissue opening before stabilizing the top
The opening gets handled constantly. Interfacing or a good facing prevents stretching and gives the top enough structure to stay flat.
Sewing through the corner pivot point
If you sew past the exact pivot point, fabric bunches at the top corners. Stop at the seam line, pivot cleanly, then continue.
Skipping the test fit before hemming
The open bottom is your last easy opportunity to adjust height and side-seam fit. Do not permanently hem until the cover has been tested on the actual box.
Pattern-Matching Tips for Stripes, Plaids, and Large Prints
- Cut the top panel first so the main motif is centered around the tissue opening.
- Mark the same horizontal reference line on all four side patterns so stripes meet at the corners.
- Cut one side panel, then use it as a visual guide for the next rather than stacking multiple layers and hoping the repeat matches.
- For a large motif, center the most important image on the two long sides of a rectangular cover because they are seen most often.
- If perfect matching would waste too much fabric, intentionally offset the print rather than producing near-matches that look accidental.
A Faster Beginner Version
If the faced opening feels like the only intimidating part, simplify the first cover rather than simplifying the fit. Sew the five-piece shell exactly as described, but finish the top opening with narrow double-fold bias tape. The result is more visibly handmade and slightly bulkier than a facing, but it is easy to control and can become a decorative accent.
Another shortcut is to use a firm light canvas and skip interfacing. Do not remove ease or fitting steps; those are what determine whether the finished cover actually works.
Care and Washing
Washability depends on the fabric, interfacing, trim, and any decorative elements you add. If you want a washable cover, prewash the outer fabric and lining before cutting and choose a washable fusible interfacing. Machine wash on gentle or hand wash, reshape while damp, and press from the wrong side.
For linen, velvet, embellished fabrics, or materials that may shrink unpredictably, spot cleaning may be safer. A removable fabric cover is already easier to maintain than many rigid decorative holders, so design the care method around the material rather than assuming every cover should go through a washing machine.
Frequently Asked Questions
How much fabric do I need for a tissue box cover?
For many standard cube and rectangular boxes, 1/2 yard of 44-inch-wide fabric is enough for the outer cover. Buy 5/8 to 3/4 yard when working with large repeats, one-way prints, pattern matching, or oversized boxes. Measure and lay out your actual pattern pieces before buying expensive fabric.
Do I need interfacing?
Not always. Quilting cotton usually benefits from light or medium interfacing, while canvas and many home-decor fabrics have enough body on their own. At minimum, stabilizing the top around the opening improves durability.
What seam allowance should I use?
This tutorial uses 1/2 inch because it is easy to measure, gives room for fitting adjustments, and works well with home-decor fabrics. You can use another seam allowance if you apply it consistently to every pattern formula.
Can I make one cover fit several tissue-box brands?
Yes, if you draft from the largest box and accept a little extra ease on smaller boxes. Measure all brands you plan to use and draft around the maximum length, width, and height.
Should the cover be tight?
No. It should look fitted but still slide on and off without pulling hard on the tissue opening. A small amount of wearing ease is necessary because the box is rigid and fabric seams add bulk.
Can I use this pattern for a square and rectangular tissue box?
Yes. The five-piece formula is dimension-based, so the same construction works for both. Only the measurements and opening proportions change.
Final Fit Checklist Before You Call It Finished
- The cover slides over the box without force.
- The top sits flat.
- The tissue opening is centered over the box opening.
- Tissues pull smoothly without snagging.
- Vertical seams align with the box corners.
- No cardboard shows at the bottom.
- The bottom hem sits evenly on the table.
- The cover can be removed for refilling without distorting the opening.
Bottom Line
The most reliable tissue box cover sewing pattern is not a fixed downloadable rectangle—it is a simple drafting system built from the dimensions of the box you actually use. Measure first, add a controlled amount of ease, add seam allowance only after the finished dimensions are established, stabilize the opening, and test the fit before hemming.
Once you have a paper pattern that fits your preferred tissue box, keep it. The same pattern can be reused for seasonal fabrics, guest-room sets, bathroom decor, or coordinated covers throughout the house. For more display ideas after sewing, see our guide to styling tissue boxes in every room and the broader tissue box cover guide.